YouTube Video Channels for Building Your Bike

YouTube Video Channels for Building Your Bike

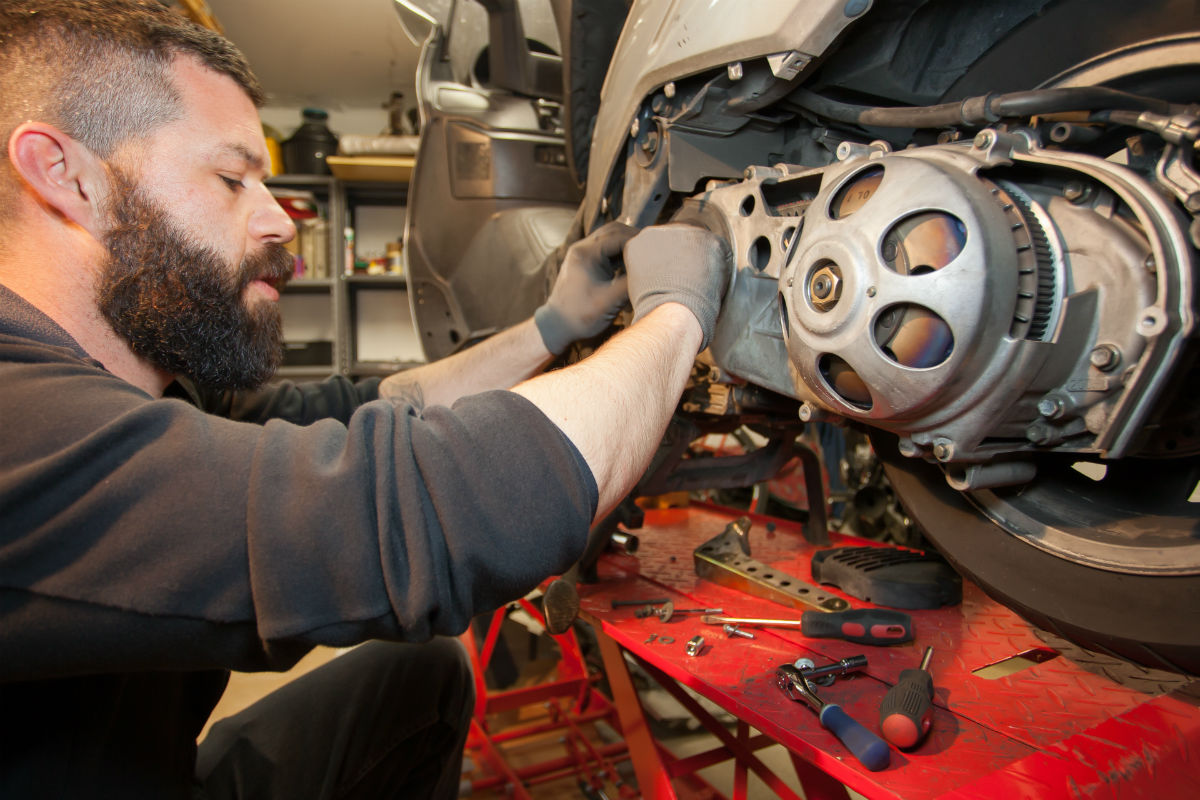
If you are doing home repairs or trying to build your next dirt bike or motorcycle, chances are you will need a little guidance. Luckily there are tons of great resources online to help you build your dream bike. Here are a few of our favorite YouTube channels to help you with your home repairs.

Mr. Max Storey

This channel has tons of great tutorials and how to’s for all things motorcycle. Not only can you learn how to clean your carbs and diagnose mechanical problems, you can also learn how to haggle for a used bike or understand how various components of your bike works. These videos are not necessarily clean and polished, but they cover a wide variety of content in extreme depth and will help you with all sorts of repairs.

Small Engine Shop

Small Engine Shop is another great resource when you are trying to build or upgrade your motorcycle or dirt bike. They cover all sorts of small engine repairs, so you are sure to find the help that you need. Another benefit of this channel is that it is run by a team of pros – not from someone’s home garage – so you know that you can trust the information that they provide.

Ichiban Moto

Ichiban Moto is a great channel because they have really in-depth repair tutorials. You can learn how to rebuild a turbocharger, replace your fork seals, or clean and polish your engine so that it is immaculate. The videos are short and easy to follow, and they simplify repairs that can seem overwhelming.

The best way to build your dream bike is by customizing it yourself. You don’t have to be a professional to make upgrades or rebuild your engine as long as you have strong directions. By using step-by-step videos from these channels, you can build the bike of your dreams without hefty mechanic bills.

5 Parts You Should Expect To Repair in Enduro Racing

enduro_dirt_bike_trail1

Enduro racing is a thrilling and rewarding sport. If you’re considering taking up enduro, you’re probably already familiar with dirt bike and motorcycle riding, but be prepared. Enduro takes a whole different level of dedication. Here are 5 parts that you will surely need to repair or replace if you do enduro racing:

Tires & Wheels

Even if you only ride once or twice a season you’ll eventually need new tires, but when you start doing enduro, you’ll go through them a lot faster. This is because you are riding more frequently and also because you are tackling harder terrain.

Filters

Especially if you are coming from road racing or track riding, you will feel like you’re blasting through filters. Be sure to clean or replace air filters after every weekend you ride. Change your oil for every three hours of riding. This will help preserve your engine by keeping it free of dirt and debris. You’ll be able to ride longer without major repairs.

Chain & Sprocket

Don’t be surprised when your chain starts wearing out. Enduro racing takes a toll on your bike because you will be navigating a lot of rough bumps and tight curves.

Clutch Cable

Breaking your clutch cable is a rare occurrence when you ride on the street, but is more common in enduro. Be proactive and change your clutch cable as soon as it shows signs of wear.

Brakes

Like with your clutch cable, keep a close eye on your brake pads (and entire brake system) when you do enduro racing. Replace the pads when they become less responsive or show signs of wear.

Enduro racing is well worth it. Just be smart about keeping your bike in immaculate shape. Keep on top of preventative maintenance, especially with simple fixes like oil, air filters, tires, and brake pads.

Buying Dirt Bike Used Parts In the Off-Season

Buying Dirt Bike Used Parts In the Off-Season
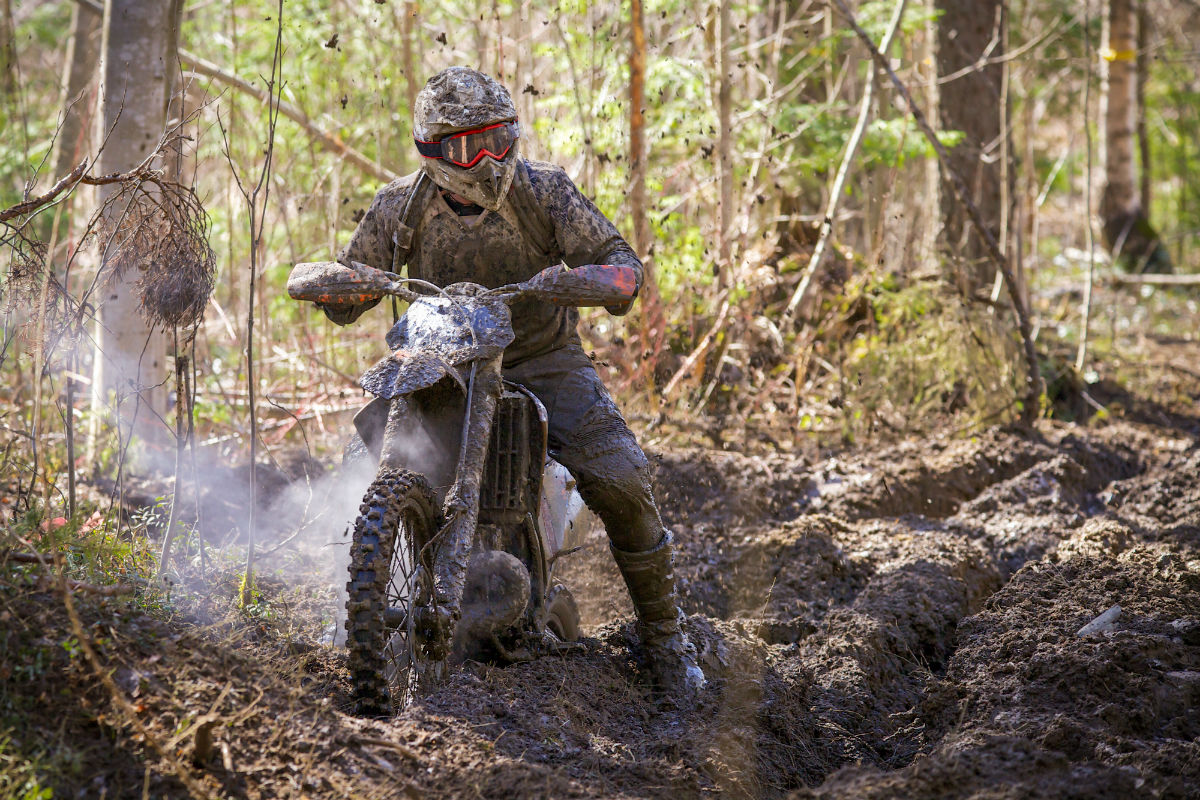
The fall can bring great muddy slopes that are fun and challenging to tackle, but when the ground and air start freezing, it’s time to put the dirt bike away for the winter. If you don’t have alternative cold-weather sports that you do the winter may seem like a giant drag, but in reality it’s a great time to get your bike in immaculate shape.

Why the Winter is Great for Buying Used Dirt Bike Parts

Before storing your bike it’s important to clean it thoroughly (including filters!) and check for any visible damage. If you’re taking a few months off from riding your dirt bike, you have the perfect opportunity to figure out any problems that you need to fix or improvements that you want to make.

Once you identify the parts that you need, it’s time to go shopping. One of the benefits of not riding for a while is that you can spend time finding the highest quality parts at the best price. You may first want to check your local suppliers, but don’t be suckered into paying too much for sub-standard parts.

You can also look online for used dirt bike parts. If you have friends who are part-saavy, ask for recommendations of where they like to buy their used dirt bike parts. You can also use informational websites or blogs to seek out advice and buying tips for the specific brand and style of dirt bike that you ride.

Another great tip for buying online is to scout out what you want, compare prices, add the products you want to your cart and sign up for the website’s newsletter, and wait a day or two.

Companies will often take extra efforts to market to those who have already showed interest in their products, so you will very likely see an ad or coupon in your email or displayed on Facebook after you have scouted out what you want.

Taking the time to shop around will ensure that you get the best dirt bike parts at the lowest cost to you. If you’re planning improvements or major repairs, the off-season is a great time to shop because you won’t feel rushed into buying something sub-standard.

Finding Great Used Suzuki Dirt Bike Parts Online

Walking into a Suzuki part shop in your local area isn’t easy for most people. Most of the shops only sell new parts, if they sell any parts at all. That’s why it’s better to find Suzuki dirt bike parts online.

How to Find Suzuki Dirt Bike Parts Online

Finding_Great_Used_Suzuki_Dirt_Bike_Parts_OnlineYou’ll need a reputable seller to find quality used Suzuki dirt bike parts. The seller should have reviews online written by previous customers. You can usually find a few reviews for good sellers, so just keep looking around until you find one that seems to be trustworthy.

Once you find a seller, you’ll have to check to make sure the part you need is available. If you know the used dirt bike part number, that is great. It’s the best way to ensure you get the right part.

If you don’t have the part number, it might be a good idea to do some research on the model of your Suzuki dirt bike, so you can find the part number. You may want to cross-reference a couple of websites before diving into a purchase to ensure you have the right part.

Once you have the part number and you find the part on a website that sells them, you can go ahead and add it to your cart and checkout. It’s always good to search online for a coupon. Some will have one and others won’t, but it’s worth the look.

When choosing the shipping method, consider how soon you need the part. Usually, good used dirt bike part sellers will ship the same day the order is placed as long as it’s received during normal business hours. If not, it’s the following day. If you choose 5 day shipping, you won’t receive the part until next week. You may want to do overnight or two/three day shipping if you’re looking to have it much sooner.

Finding quality used dirt bike parts is not difficult. Once you find a seller that has quality parts, you will be set for life. You can turn to that seller every time you need replacement parts for your Suzuki. You’ll save a lot of money too because used parts are always much less expensive than new ones and definitely much less expensive than buying a brand new dirt bike.

Go ahead and find the used parts that you need now. You’ll be glad you did when you get your parts in the mail and install them. Your dirt bike will work as good as new!

7 Mistakes All Rookie Bikers Make

Dirt-biking can either leave you feeling exhilarated or exasperated and it’s all down to the way you ride. No one wants to see their day ruined by a few simple errors in judgement, so learning how to do things properly is the key to staying focused and staying safe. Everyone is a beginner once, but until you’ve mastered these basic steps, you’re going to be stuck in the slow lane.

1. Check Your Fuel

Sounds easy, doesn’t it? Well, you’d be surprised at the number of times people forget to fill up their tank. Dirt bikes use up fuel at different rates depending on the terrain you’re riding on and how hard you push them. Always top up your bike after a long ride – you might think you’re set for another day on the road, but you can never be sure what’s lying ahead. Stay safe and keep your engine well fed.

2. Don’t Go Full Throttle Too Soon

One thing you’ll learn about dirt bikes is that they can accelerate like nothing else – a fact that many beginners overlook. The balance between the throttle and the clutch can be a tricky one to workout at first, so don’t go thinking you’ve mastered it before you’ve built up any speed. This is when things start to go wrong…quickly. Take the bike through a few practise laps, slowly increasing the speed each time. Once you feel settled, you can begin playing with the clutch and shifting gears when the need arises.

3. Avoid Showing Off

You’re riding with your mates. A big corner comes up and you round it like a pro. You can hear your friends cheering, so you look behind and flash a boastful smile. The next thing you know you’re lying flat on your back at the base of a tree. Although it can be tempting to admire your own skill, dirt biking is all about anticipating the next move – something you can’t do if you’re looking the other way. It’s always great fun to talk about the time you landed an outrageous jump, but save the chat for a point after you’ve finished riding.

4. Always Look Where You’re Going

This ties in nicely with the last point. On a dirt bike, everything important will be happening in front of you. The speed of the bike means that one momentary lapse in concentration can send you hurtling off the track. In the beginning it can be difficult to stop yourself looking down, as you’ll want to check your hands are doing the right thing. Getting past this is one of the fundamental lessons of biking, as where your eyes go your body tends to follow. Looking where you’re going will help direct your bike evenly into the corners.

5. Make Sure Your Helmet Is Secure

It’s obviously vital that your helmet remains securely on your head, but what I’m referring to in this instance is where you put it when you’re not riding. With so many other things to think about, it can be easy to just cast your helmet aside when you take a break. This is all well and good on a flat piece of land, but wherever there’s a hill there’s a chance of your gear rolling away. The best place for your helmet to perch is either on your handlebars or footpegs, as believe me, running flat out after it through the mountains is not the thrill you’re looking for.

6. Perfect Your Balance

Many people fail to take the weight of the bike into account when they are starting out, meaning they are never fully steady. At first, you might need to practise taking off at slower speeds, until you feel comfortable with your positioning. Crawl into a few corners +and get used to the balance between your bulk and the bike’s, before you head out onto the track.

7. Don’t Forget To Enjoy Yourself

The cardinal sin of so many debut bikers. If you are too focused on nailing the ride within the first couple of minutes, you’ll miss the opportunity to just have fun. We all want to feel like a pro, but, just like with any other sport, dirt biking takes patience and dedication. So grab your gear, jump on your bike and start on down the road to motor cycling bliss.

Author Bio: Ed Wild is a motorcycle enthusiast, writer, and the founder of Redtread, a motorcycle holiday provider in Andalucia, Spain.

ATV Used Parts: Mistakes To Avoid Like The Plague

ATV_Used_PartsEveryone knows that buying used ATV parts online is an excellent way to reduce the cost of repairs, but there is a right way and a wrong way to ensure that you aren’t getting ripped off when working with online vendors. Unfortunately, a few bad vendors give the reputable used part vendors a bad reputation, but ATV owners who have located quality businesses online can get the best of both worlds–excellent used parts at great prices and top customer service.

When buying ATV used parts, here are 5 mistakes to avoid like the plague:

1. Don’t guess on the part you are looking for.

When buying used ATV parts, your search online or in the nearest salvage shop will only be as good as your knowledge of what part you need. If you don’t know all the information about the part you need, you could be looking at weeks of frustration as you buy and send back wrong parts for your ATV. Knowing exactly what you need will help your search online.

2. Avoid online searches that are too broad.

When searching for online parts, make sure you include all the information you need to properly identify the part. If you enter incomplete or wrong information in an online search, the right parts will never be shown to you and you will get frustrated trying to locate them. In your search engine, type in the exact year, make and model, plus the name of the part. If you have located a reputable used parts vendor, you can perform the search within the company’s website to go through their inventory.

3. Don’t choose companies that have poor or no customer reviews.

Any good online parts vendor will be proud to share the glowing reviews and recommendations from satisfied customers. However, make sure to look on neutral sites to see what customers really think. Go to online ATV forums that talk about used parts vendors, and check out third party rating and review sites that give participants a chance to rank businesses and provide comments. The more positive things you read about an online ATV used parts vendor, the more confident you can feel in giving them your business.

4. Stay away from vendors that have a poor quality website.

The best online stores have lovely websites with clear pictures, detailed descriptions and easy shopping process. If a used ATV parts business wants to show the world how well they can take care of the customer, they will put time and resources into a quality website. If a website is hard to navigate, difficult to get information from or tough to make a purchase from, it’s a good sign that the company may not be one you want to deal with.

5. Don’t give your business to vendors that you can’t contact easily.

A reputable parts vendor should have numerous ways for customers to contact them, such as email, phone, text and even live chats during business hours. If an online vendor is difficult for customers to get ahold of, it can mean poor customer service and questionable merchandise. It can also signal a tedious return or exchange process in case the part doesn’t work out.

ATV owners will save a lot of money and stress when they purchase quality used parts online with as much wisdom and caution as they would making any other online purchase.ATV owners who follow these tips are sure to have a great experience in buying used ATV parts online. However, if they make these rookie mistakes, they could be in for a lot of frustration and headache.

Do Know When To Replace Your Motorcycle Helmet?

If you are a motorcyclist, your helmet should be your most valued piece of safety equipment. Most states have laws making it mandatory to wear a helmet, and even if you live in a state that leaves it up to you, your helmet could very well save your life in an accident. You may have a high quality, high tech helmet that you love, but helmets don’t maintain their quality forever so it’s important to know when it’s time to part ways and purchase a new one.

Has your helmet sustained trauma?

If you have been in a motorcycle accident, even a minor one, and you remember hitting your head at all, it is smart to replace your helmet. It might have felt like a minor bump to the head, but that’s probably because your helmet absorbed a whole lot of the impact! Even if you were involved in an accident and don’t remember hitting your head, you might want to have your helmet tested just in case, or if you are able to replace it just as a precaution.

Motorcycle accidents aren’t the only type of accident that can deteriorate a helmet. If you have butterfingers and drop your helmet more than a few times on a hard garage floor or outside on the pavement, it can become less effective in the event of an emergency. If you have any question of whether or not there is damage you can either have your helmet tested, or replace it just to be safe.

What does your manufacturer say?

Most manufacturers recommend that you replace your helmet every 2-4 years whether or not it has absorbed any substantial impact in the time you’ve had it. I don’t know if anyone keeps the original box or packaging their helmet comes in (I certainly don’t), but your helmet should indicate the manufacturer with a logo or some type of marking. Visit the website of the manufacturer and see if you can find their recommendation for the particular model of helmet that you have.

The reason manufacturers recommend that you replace your helmet every few years is not to make you purchase more helmets over your lifetime, but because they can only guarantee the effectiveness of their product for so long. The insulating materials as well as the glues deteriorate from time as well as oil (grease, lube, or just the oil your body produces), dirt, and any other contaminant that it may come in contact with.

Has your helmet sustained substantial (or minor but repeated) trauma? Have you had your helmet for more than a couple of years? Chances are that you would be safer if you bought a new one.


Dirt Bike Riding Tips: Uphill Rollers

When you’re new to riding and exploring different local tracks, you’ll likely encounter uphill rollers sooner rather than later. Uphill rollers are a series of small bumps leading up a slope, and taking them with the proper technique will help you take the slope with ease.

Getting Into Gear

You may be tempted to shift gears as you ascend the hill, but it’s most efficient to choose a gear to drive you all the way up the hill, and keep with it. Look for consistent top end power– 3rd gear will usually give you consistent drive all the way through the bumps and off the crest of the hill.

Body Position

As you attack the hill, you will want your weight to be centered in the middle of the bike, but with your weight slightly towards the rear. This will allow you a light front end, which will make your riding experience a whole lot easier. No matter how high your skill level uphill rollers are a rocky road, so you want to tightly grip your dirt bike with your legs to maintain proper control and balance.

Controlling Your Bike Through the Rollers

The goal as you hit the rollers is to soar over them. Don’t let your front end dip into the base of the rollers. Allowing this to happen will compress the suspension, and it will unload on you which is far from ideal when you are going uphill. Keeping your front end light and keeping your body weight to the rear of your bike will help you accomplish this. Accelerating steadily uphill will also help you avoid getting bogged down in the base of the rollers, and will keep momentum going where you want it.

Cresting the Hill

You can often jump the top of this type of hill, so pick a line and get ready. Whipping the bike may be the best way to handle it depending on what’s upcoming on the track. This will help you keep your dirt bike closer to the ground, so you won’t waste valuable seconds on your track time. Approach the top at an angle, control the bike with your legs, and make sure you are able to straighten out and recover in time to land.

Uphill rollers are a common obstacle on the tracks, so knowing how to handle them will improve your quality of riding. The objective is to keep your front end light enough that it doesn’t sink into the base of the roller, and to do so is simple: all you need to o is manage your speed and body position and you are golden!

Dirt Bike Riding Tips: Off Camber Turns

How well you corner can determine whether you win or lose at the tracks. The mastery of different types of turns is one thing that all pros have in common, and for newer riders learning a variety of techniques for cornering will help you excel no matter where you ride. One particularly challenging type of corners is off camber turns, and learning to take them like a pro will help you improve your skills as a rider as well as save valuable seconds on the track.

Taking an off camber turn can feel like the ground is falling out from under you which may be unsettling when you are new to dirt bike riding. Don’t worry, we’ve got a few tips to help you master this kind of terrain.

Always Look Ahead

When you are tackling a new track or new terrain, you never know what your next obstacle will be. A camber turn can sneak up on you if you don’t have your eye out for them, so make sure you are carefully analyzing every new turn you approach. If you approach a camber turn with the speed of any other turn, you’ll likely find yourself losing control.

Take It Slow

Taking it slow is common advice when you are just learning a new technique or trick, but even if you are an experienced rider it’s the best way to approach off camber turns. If you hit the turn too fast the momentum of your bike will want to drag you down the slope, which is not what you want. Taking it slow will allow you more control of your dirt bike, so you will be more successful in this technique.

Body Position, Body Position, Body Position

I feel like a broken record here, but body position is vital in nearly every technique you perform on a dirt bike. When you take off camber turns, you want to focus your body weight on the outside foot peg while keeping your torso straight up. This helps the bike lean over at the proper angle to maintain maximum traction which keeps you in control and prevents you from slipping.

Hold Off on the Throttle

If you throttle on a camber turn as you would on any other turn, you’ll lose your back end down the slope. Instead you want to roll through the whole turn. Begin by braking sooner than you normally would, and allow yourself to roll into the turn. Only throttle at the end when you feel traction on both the front and back tires.

Mastering camber turns will help you reduce your track time and have more fun on the trails. They are not an uncommon obstacle, so learning how to make it through without slipping will make your riding experience a whole lot easier.

Dirt Bike Riding Tips: Riding Dirt Bikes In Sand

Sand can seem like an intimidating surface for some dirt bike riders, but once you learn the art of it it can become one of the most enjoyable. Lack of technique and lack of confidence are the two biggest mistakes in the dunes. Learn the proper technique, practice, and over time your confidence will soar.

Considerations for Sand Riding

The proper sand conditions will make your dirt bike riding experience so much more fun. When you are first learning to ride in the sand, slightly wet sand is ideal. Damp sand will provide better traction and control than dry sand, although cold, wet sand doesn’t necessarily grip well.

You will want to pack plenty of water when you go out to the dunes, but avoid weighing down your bike with unnecessary equipment. Bring a few bottles of water with you, or a hydration pack, but keep everything else minimal.

Preparing Your Bike

Lower tire pressure will help you maintain better control when you are riding in the sand. Aim for 10-12 PSI for optimal traction. You also will want to make sure that your bike is powerful enough to handle sand dunes. Don’t attempt the dunes on anything smaller than a 250cc two-stroke, and don’t be afraid to really use the throttle when you are riding. It’s also smart to bring an extra can of gas– you’ll be eating through it with the power you’ll need to tackle this terrain.

Technique

Again, power will be your best friend when you are riding in sand. Acceleration is difficult in sand so you will want to accelerate sooner, and your bike will naturally slow substantially just by letting off the throttle. The most effective way to distribute the weight on your bike is by focusing the weight to the rear of the bike, which helps maintain better traction of the back tire.

It is also important to focus on steering with your lower body as opposed to yanking the handles around. Grip the bike tightly with your knees, and let the front wheel glide. If you find yourself in a sharp corner, shift your weight forward, allowing your back wheel to whip around the turn.

What Not to Do

  • DON’T Shift down if you hit a bog – this will dig you in! You want to maintain throttle at at least 50%
  • DON’T slam on the front break – this causes the front tire to lock, and it may dump you.
  • DON’T be afraid – sand is not an easy surface to ride on, but it is more forgiving when you fall